

✍️ Week 1 lesson 7 of DataTalksClub 2022 data engineering zoomcamp, ☁️ GCP intro, 🤖 service account, 🃏 roles, and 🧰 gcloud CLI
Today, we will follow DataTalksClub's videos that introduce the Google Cloud Platform (GCP):
- DE Zoomcamp 1.1.1 - Introduction to Google Cloud Platform.
- DE Zoomcamp 1.3.1 - Introduction to Terraform Concepts & GCP Pre-Requisites.
Which are part of the DataTalksClub 2022 Data engineering Zoomcamp week 1 repo.
In our last post, we reviewed SQL basics, following DataTalksClub's video: DE Zoomcamp 1.2.6 - SQL Refreshser.

💬 In this lesson, we will:
- Introduce the Google Cloud Platform.
- Create a GCP account.
- Set up our first GCP project.
- Review GCP Identity Access Management concepts.
- Create a service account for our infrastructure application.
- Generate the service account key to be able to authenticate from our local computer.
- Install the Google Cloud CLI on our local computer.
- Authenticate our Google Cloud CLI installation.
- Add roles to the service account to create storage buckets, work with files, and interact with BigQuery.
- Enable the project's IAM APIs so we can access them from our local computer.
This post is part of a series. Find all the other related posts here

☁️ What is the Google Cloud Platform?
The Google Cloud Platform, or GCP, is a suite of cloud computing services offered by Google that runs on the same infrastructure that Google uses internally for its end-user products (Search, Gmail, Drive, YouTube). GCP includes a range of hosted services for compute, storage, and application development.

That's a lot! But not all of it. Please visit the link below for a comprehensive and interactive list of services. However, in this zoomcamp, our focus will be on the Big Data and Storage and Databases services.
👤Create a GCP account
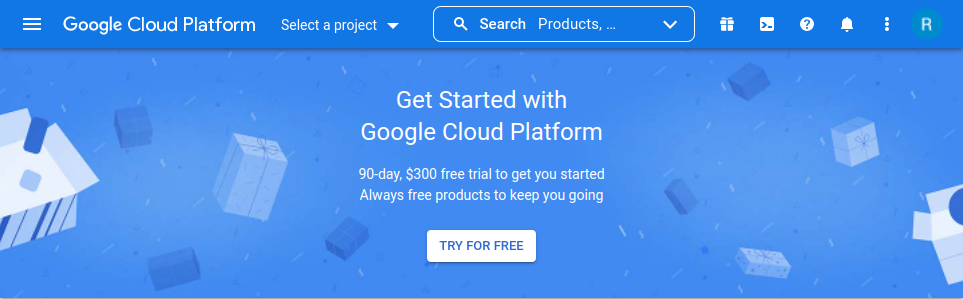
To create a GCP account, navigate to: https://console.cloud.google.com/
In this case, I was already logged in to Gmail, so my Google account was automatically recognized and presented in the top right corner. If you have different accounts, you can use this button to select the appropriate one, e.g., personal, work, or school. If you don't have a Gmail account, you can get one in Google Signup.
At the time of this writing, Google is running a promotion for new users to signup for a free 90-day or $300 trial, so let's use that to get us started. Here are some of the questions asked to create your account:
- Country
- What best describes your organization's needs?
"Class project/assignment" fits nicely. - Read the Terms of service.
Note:- The free trial is available only for new GCP users.
- The service is restricted to 8 cores of Google Compute Engine.
- No crypto mining!
- Service level agreement and Google's indemnity don't apply, so don't keep anything too important until you have upgraded your account.
- Phone number
It will be used to send you a verification code, so make sure you have access to your phone while signing up. - Account type
Individual (only one user) - Payment method: This can be a credit or debit card, PayPal, or a bank account. They need this information to help them reduce fraud and abuse, with the promise that you will not be charged unless you turn automatic billing on (manual upgrade).
- What brought you to Google Cloud?
Learn more / explore - What are you interested in doing in Google Cloud?
Data analytics, Data management, AI / ML, Virtual machines. - What best describes your role?
Data Scientist / Data Engineer
After completing the registration, you will be prompted to follow the tutorials for the compute engine, cloud storage, and cloud SQL services. These are tied to your project, so here I added the links to the reference guides instead:
To which we can come back later.
🐣 Setting up your first GCP project
After signing up to GCP, you will get to the "getting started" page
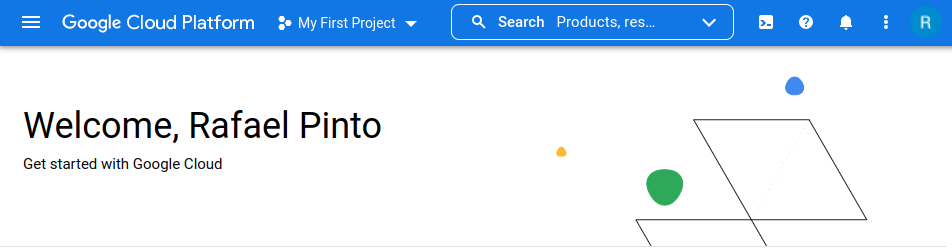
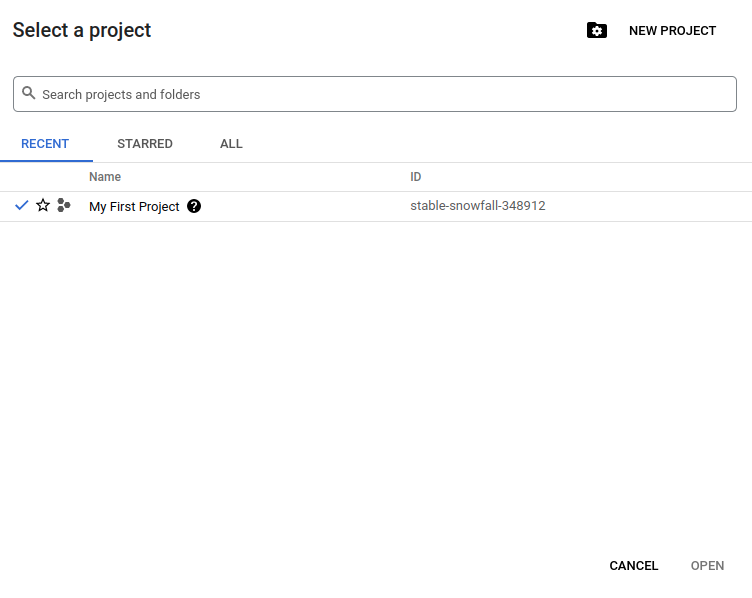
From which we can select a project by clicking on the project drop down button (My First Project ) in the top bar.
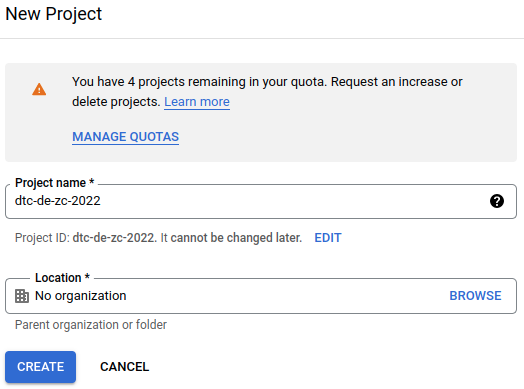
Let's create a new project for this course by clicking on the NEW PROJECT button in the top right and name it dtc-de-zc-2022.
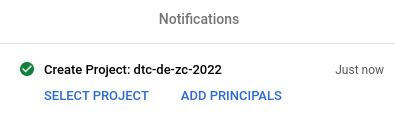
After MB1 on CREATE, you will see a notification that the project was created
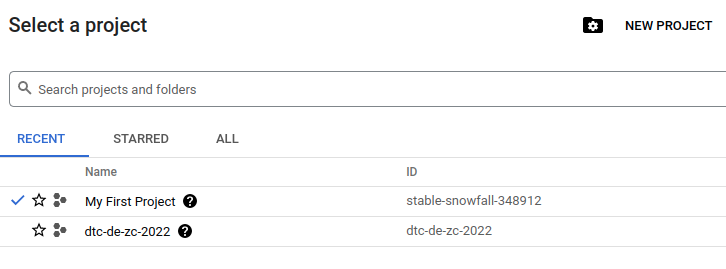
Once the project is created, we need to switch to it by going to the top bar, MB1 on My First Project and MB1 on the project name dtc-de-zc-2022.
👮 IAM overview
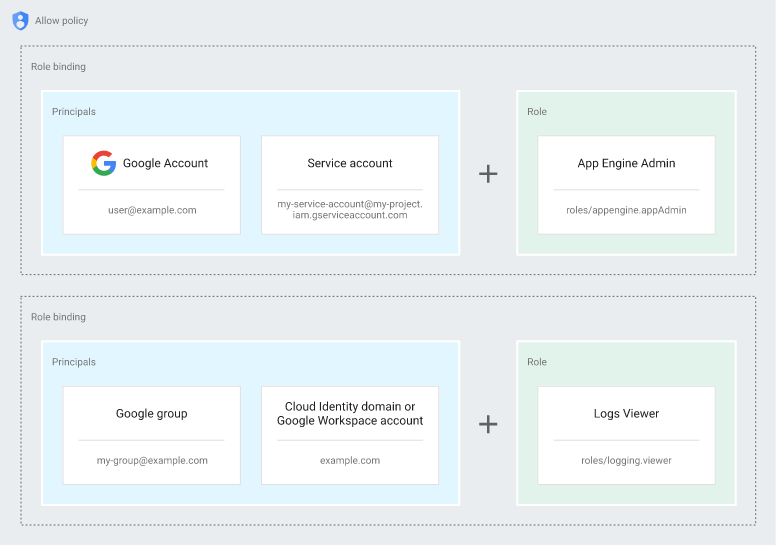
IAM stands for Identity Account Management. IAM lets you grant granular access to specific Google Cloud resources. We looked at a few Google Cloud resources before when we talked about Big Data and Storage and Databases services. With IAM, you define who (identity) has what access (role) for which resource.
In this model, permissions to access a resource aren't granted directly to the end-user. Instead, permissions are grouped into roles, and roles are given to authenticated principals. The permission management in IAM consists of three parts:
- Principal: Answers the who. It is a set whose members type can be a Google Account (for end-users), a service account (for applications and compute workloads), a Google group, a Google Workspace account, or a Cloud Identity domain that can access a resource.
- Role: Answers the what access. A role is a collection of permissions. Permissions determine what operations are allowed on a resource.
- Policy: The allow policy is a collection of role bindings that bind one or more principals to individual roles. When you want to define who (principal) has what type of access (role) on a resource, you create an allow policy and attach it to the resource.
This and more information are available in:

🤖 Create a service account
A service account is an account for an application or compute workload instead of an individual end-user. When you run code that's hosted on Google Cloud, the code runs as the account you specify. You can create as many service accounts as needed to represent the different logical components of your application. For more information about using a service account in your application, see Getting started with authentication.
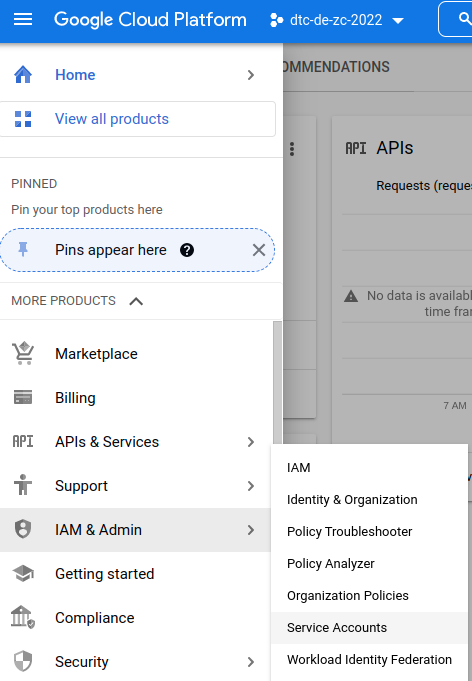
To create a service account, MB1 on the top bar navigation menu (left corner), and navigate to IAM & Admin > Service Accounts.
This will take you to the service account page for the current project
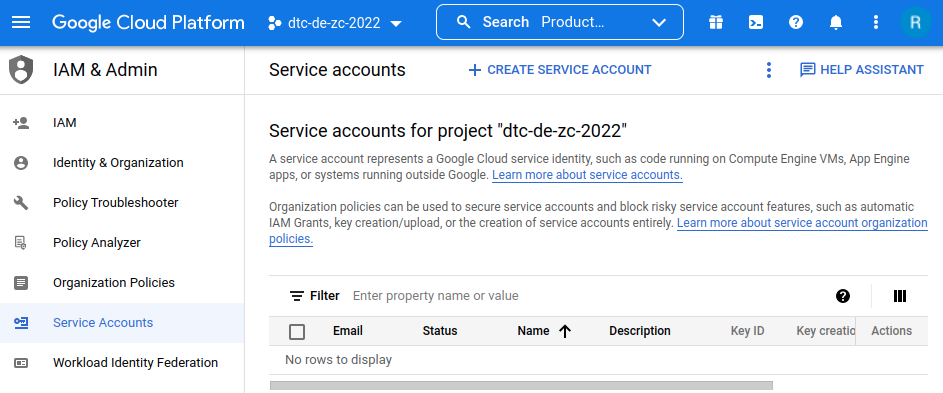
where we can MB1 on the + Create a Service Account button in the top area. Then, fill the creation questions as shown below.
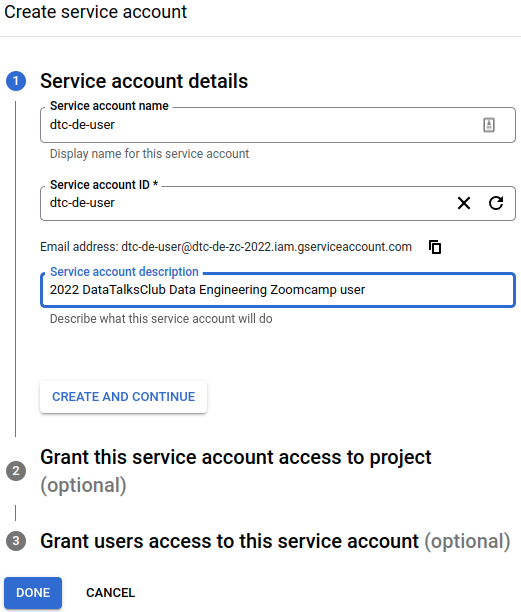
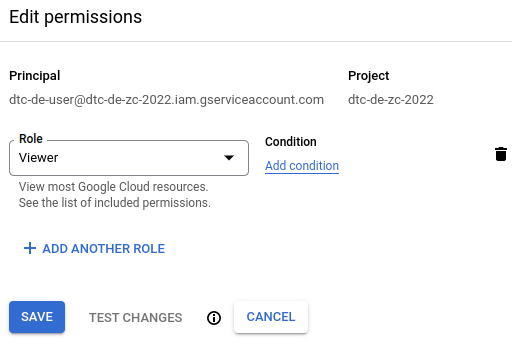
MB1 on Create and continue, and fill the next form as shown to grant our service account viewer access to most Google Cloud resources.
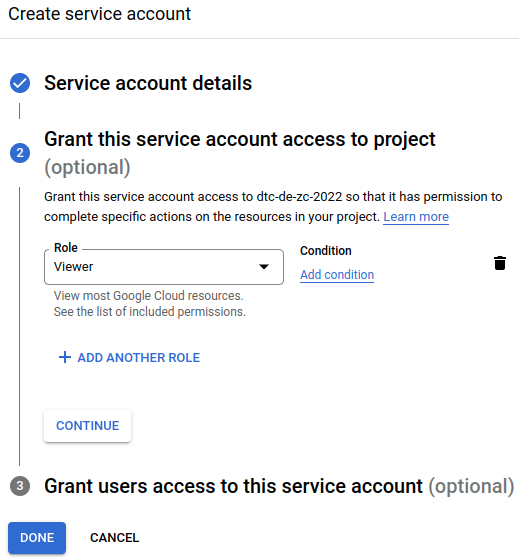
The last step can be used to share this service account with other users, but we won't do that here, so we can MB1 on Done to complete setting up the service acccount.
🗝️ Generate service account key
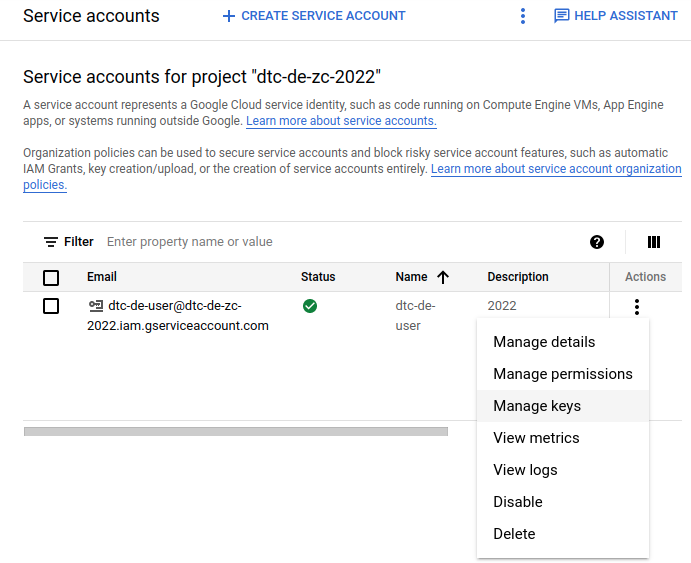
After completing setting up the service account on the previous section, we can generate its key so we can access the service account remotely, i.e., from our local machine. For this, MB1 on the three vertical dots in the service account page, and select Manage keys
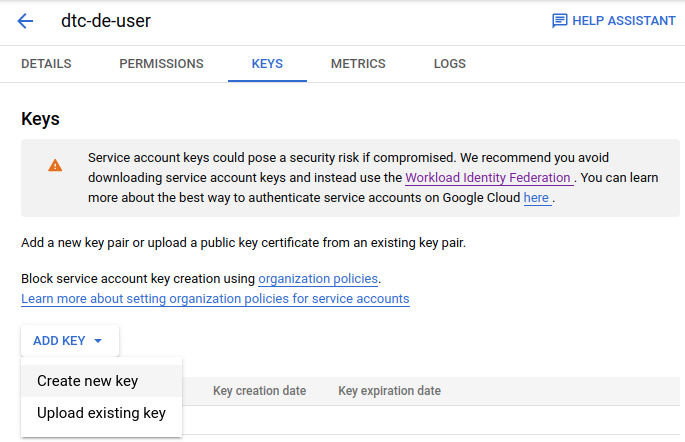
This will take us to the Keys page, where we can MB1 on the Add Key button, and select Create new key
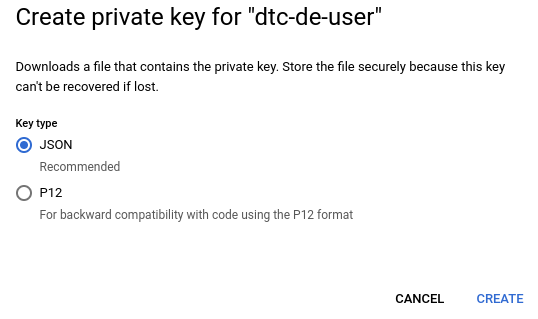
The following message will appear, where we select the JSON key type for downloading the service account key and then MB1 on the Create button.
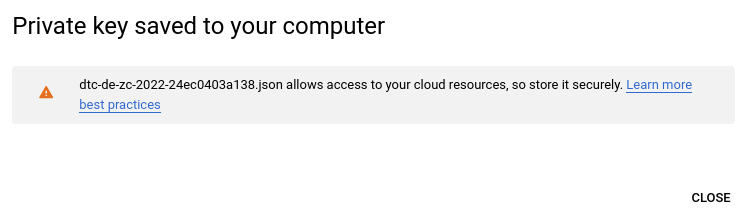
A file save window will appear where we can select the location to download and store the private key JSON file. After you MB1 on the Save button, the following confirmation window will appear.
🧰 Install Google Cloud CLI
The gcloud CLI manages authentication, local configuration, developer workflow, and general interactions with Google Cloud resources. With the Google Cloud CLI, it’s easy to perform many common cloud tasks like creating a Compute Engine VM instance, managing a Google Kubernetes Engine cluster, and deploying an App Engine application, either from the command line or in scripts and other automations. -cloud.google.com/sdk
Let's follow the installation instructions on the gcloud CLI Quickstart guide.
I'm running Ubuntu so I'll follow the steps for installing gcloud CLI using a snap package. On a terminal window we type
$ snap remove google-cloud-sdk
snap "google-cloud-sdk" is not installed
To verify that we don't already have the package. Then we run the install command
$ snap install google-cloud-cli --classic
google-cloud-cli 385.0.0 from Cloud SDK (google-cloud-sdk✓) installed
We can add the gcloud CLI tools to our PATH with
source /snap/google-cloud-cli/34/completion.bash.incFinally, we initialize the gcloud CLI by running
gcloud initWhich will run a few diagnostics and ask you to log in
$ gcloud init
Welcome! This command will take you through the configuration of gcloud.

Your current configuration has been set to: [default]

You can skip diagnostics next time by using the following flag:
  gcloud init --skip-diagnostics

Network diagnostic detects and fixes local network connection issues.
Checking network connection...done.
Reachability Check passed.
Network diagnostic passed (1/1 checks passed).

You must log in to continue. Would you like to log in (Y/n)?  y
When you hit enter after typing "y" to answer the last question, a new web browser window will pop up. There, select your gmail account and follow the prompts until you get the You are now authenticated with the gcloud CLI! message/site.
Back in the terminal, you need to select which project to use. Chose the dtc-de-zc-2022 project we just created by typing the number next to it, 1 in this example, and then hit enter
You are logged in as: [your-account@gmail.com].

Pick cloud project to use:
 [1] dtc-de-zc-2022
 [2] stable-snowfall-348912
 [3] Enter a project ID
 [4] Create a new project
Please enter numeric choice or text value (must exactly match list item):  1
This will associate out project with the default gcloud configuration. Make sure to read through the post installation messages as they give you great ideas on how to work with the CLI, like if you want to manage many projects, or set a default compute region.
️🔐 Authenticate Google Cloud CLI
Now we need to allow gcloud CLI to use service account credentials to make requests. For this, find the path to the JSON file with the service account key we created in the 🗝️ ️Generate a service account key section. I placed mine in the Download folder, so I'll list the files that start with the project name to get the full path to the file. For security reasons, it is best practice to move this file to a different place in your system, but we leave that as homework for the reader 🙂.
$ ls ~/Downloads/dtc-de-zc-2022-*
/home/pinto/Downloads/dtc-de-zc-2022-24ec0403a138.json
Next, we need to add the content of this file to an environment variable
export GOOGLE_APPLICATION_CREDENTIALS=/home/pinto/Downloads/dtc-de-zc-2022-24ec0403a138.jsonFinally, we can authenticate the gcloud CLI with
gcloud auth activate-service-account --key-file $GOOGLE_APPLICATION_CREDENTIALSMore on the authentication command here:
🃏 Add roles to service account
In a future lesson, we will use Terraform to create the infrastructure we need to run our project, e.g., create storage buckets, add files to them, and interact with BigQuery. Since Terraform will use our service account to perform these operations, in this step, we will add the necessary permissions to the service account.
Let's go back to IAM & Admin GCP page on a web browser to add a couple three more roles to the service account we created in a previous section.
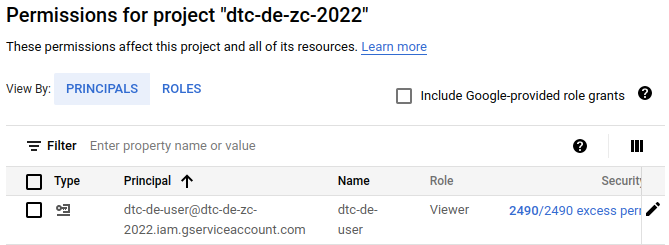
On the IAM page, MB1 on the Edit Principal button (pencil icon) in the right most column of the row that shows the service account we created before. This will bring up the Edit permissions pane, as shown below.
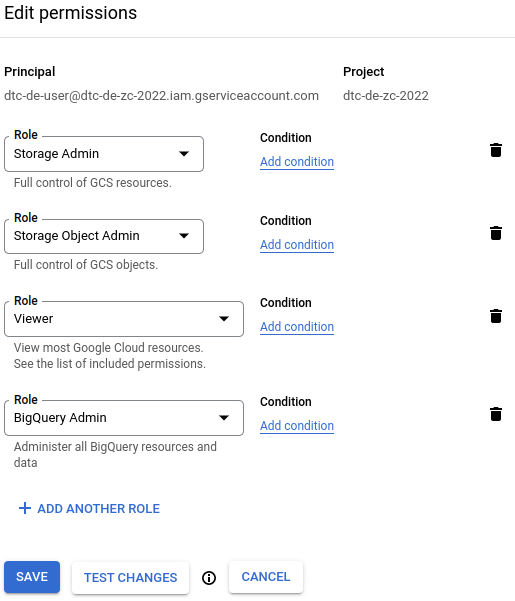
MB1 on +ADD ANOTHER ROLE and select Storage Admin. This role allows the principal to create storage buckets. Now, repeat this process to add a Storage Object Admin role. This role allows the principal to create/delete/edit/grant access to files in the storage buckets. Finally, add a BigQuery Admin role to allow interactions with BigQuery. After you are done adding the roles, the Edit permissions pane should look like the figure below.
MB1 on the SAVE button to apply the changes
🤝 Enable the project's APIs
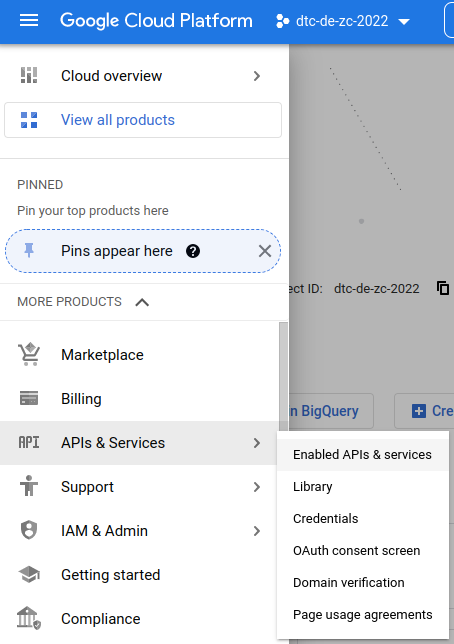
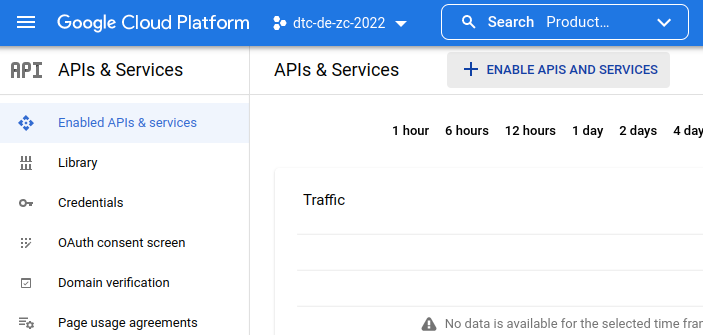
The local environment we set up in our system interacts with the project's cloud environment through APIs. In this step, we will enable two APIs (IAM and IAM credentials) to allow this interaction. In the cloud cloud, verify that the class project is selected (e.g., dtc-de-zc-2022) in the top bar, and then MB1 on the navigation button (top left corner) > APIs & Services > Enable APIs & services.
In the APIs & Services page, MB1 on the + ENABLE APIS AND SERVICES button near the top center menu bar.
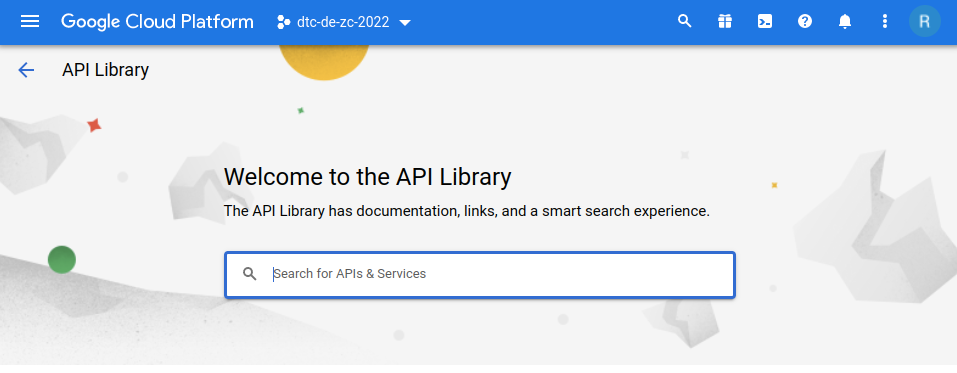
This will take us to the API library page, where we can type a search query in the search bar.
Let's search for IAM API
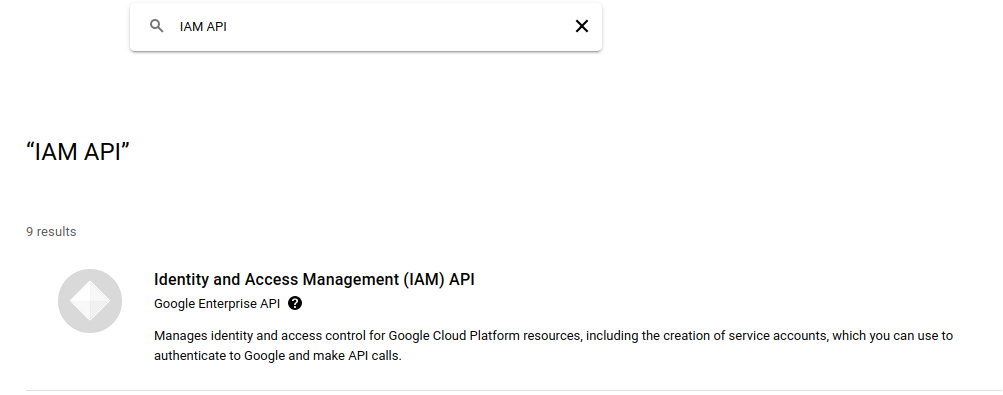
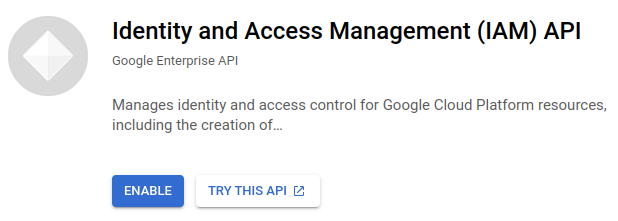
and MB1 on the Identity and Access Management (IAM) API result. In the IAM API page, MB1 on the ENABLE button.
Now let's repeat the process to find and enable the IAM credentials API.
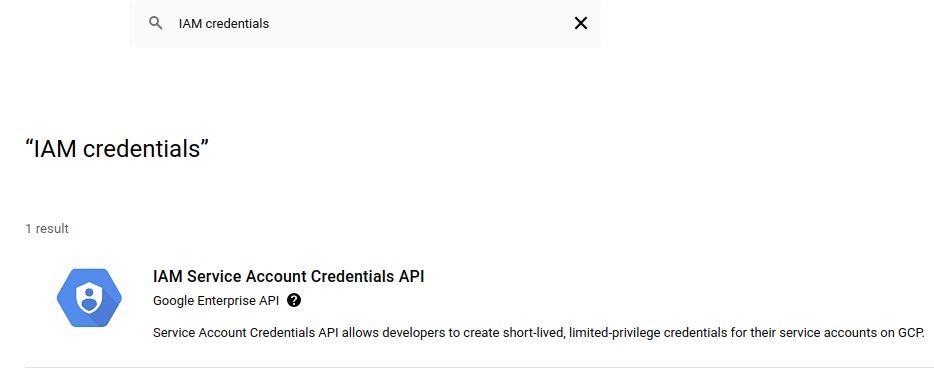
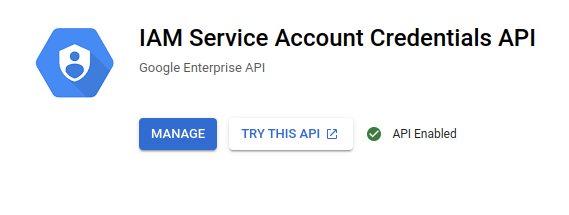
It is possible that by activating the IAM API, the IAM Service Account Credential API gets automatically enabled.
📝 Summary
In this post we:
- Introduced the Google Cloud Platform.
- Created a GCP account.
- Set up our first GCP project.
- Reviewed GCP Identity Access Management concepts.
- Created a service account for our infrastructure application.
- Generated the service account key to facilitate authentication from our local computer.
- Installed the Google Cloud CLI on our local computer.
- Authenticated our Google Cloud CLI installation.
- Added roles to the service account to create storage buckets, work with files, and interact with BigQuery.
- Enabled the project's IAM APIs so we can access them from our local computer.
